In this blog you will be introduced to the best metal roofing flashing detail for chimneys, curbs, HVAC units, and skylights you have ever seen. This is not just some variation of another sheet metal detail, it's an entirely new way of doing metal flashings around roof top obstacles. It does not require a welded custom curb and can be taught to most sheet metal workers relatively easily.
All metal roofing, not just standing seam, has had to combat the problem of what to do when something blocks the metal pan and water is trapped behind the curb, chimney or unit.
Over years we have seen just about every type of flashing job in failed attempts to stop leaks around units, chimneys and skylight including tar, caulk, metal roof coatings, spray foam, did I mention tar, caulk, and coatings?
Let me introduce you to the way metal flashings are done with the 138 T standing seam metal roofing, It called the traverse panel detail. The idea is simple, instead of bottlenecking water behind a roof top obstacle, we will divert the water to the sides with the same metal roofing panel as we used on the roof, the 138 T, hence the name travers panel detail.
Here's how it works
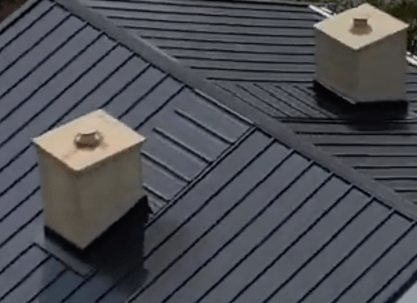
Step 1 . We start off by roofing in the home or building with the 138 T metal panel and we don't have to make any real adjustment to where the metal falls in relation to the curb, skylight, chimney, etc. We simply cut the metal around the obstacles and use normal sheet metal techniques like bending the sides of the cut panel upwards to divert water away from the curb.
Step 2. We then install our Z flashing around the front of and up the sides of the curb so that our head wall and side wall trim can “hook up” to the Z . We don’t stop our Z behind the curb, instead we let it run up to and under where the ridge cap will sit.
Step 3. We start with the front apron piece of flashing making tabs on the sides of the curb. Then we jump to a piece of flashing behind the curb. We make this piece of flashing out of a piece of the 138 T metal.
Step 4. To make the piece of flashing that goes on the back side of the curb we simply cut the leg of a piece of 138 T metal roofing panel and fold it until we have a bend accurate to the roof pitch.
Step 5. We now know where the back piece of flashing is folded and we can install the side wall flashing and turn it up at the right point to make a good clean fit. Then we fold the shared edge of the back flashing over the edge of the side wall.
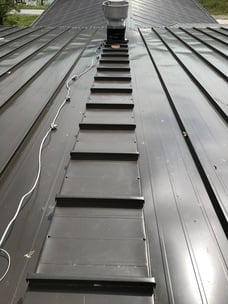
Step 6 Next we use 1.5 “ roofing insulation to fill in the gap in the metal bands and proceed to install the rest of the travers panels making sure that there is butyl tape on the z and on the sides of the 138 t travers panels with the tab on the uphill side.
Step 7. We run the travers panels up to the ridge and cut the leg off the last panel and make a hem so that it can be covered by the ridge.
As you can see this type of flashing system is:
-Easy to do
-Uses the same 138 T metal roofing as the roof
- Takes the water and diverts it way from the curb
- Totally leak free design
- Even if screws fail they fail outside the system.
- Doesn’t matter where or how metal falls around curb detail still works.
- No custom curb needed- just the scrap material from the roof.
This is just another one of the amazing features of the 138 T style standing seam