Tip 1. Ordering, Waste factor, and the right kind of board
Before you can install any polyiso board you have to figure out what you need and order it. You can go about this two ways:
1.Take the entire Sq. Ft. of the roof deck where iso is to be installed, divide by the Sq. Ft. of the board, usually 4’ x 8’ or 32 Sq. Ft. then round to the nearest board and add a waste factor ( 10%) and order.
Example
Roof Deck 126’ x 139’ = 17,514 Sq. Ft. ÷ 32 ( Sq. Ft. in one 4’ x 8 ‘sheet ) = 547.3125 or 548 sheets to cover the roof deck add 10% waste and your new total is 603 pc.
2.You can do a lay out of exactly how the board will fit on the roof deck then count them up and add waste. This method takes more time but will be slightly more accurate especially on smaller jobs.
Now you know how much polyiso you need per layer but you still need to figure out what kind of iso your going to buy. If roofing membrane you are using is adhered you're going to need an iso board with a fiberglass facer. If your membrane is going down mechanically attached (screwed down) you don’t need this facer. Don’t pay for things you don’t need, commercial roofing projects are expensive enough.
Hint: Watch out for deficit freight charges and fuel surcharges. Deficit freight can apply when your order doesn't fill up an entire semi-truck load regardless of how many truck loads you are buying of iso. You should definitely add these charges to any cost comparison you do between venders. If your job involves a tapered ISO package you may want to consider letting your vendor make a shop drawing and do a take off for you. You won’t learn how to do tapered layout in a blog and making mistakes on with tapered ISO can be expensive.
Tip 2. Determine the R-value you want and divide the thickness by 2
The NRCA ( National Roofing Contractors Association) recommends that polyiso be installed in two layers with staggered joints. That means that the edges of the first and edges of the second layer shouldn't be directly on top of each other but at least 6” apart. This will prevent a phenomena call thermal bridging where a roofing membrane will condensate on the bottom or warm side of the building instead of the top side of membrane. This condensation can cause a kind of fake roof leak that is impossible to find, it’s much easier to stagger the polyiso board.
Hint: If the polyiso is going down mechanically attached ( with screws and plates ), you can loose lay the first layer in place (without putting screws and plates in it). Then lay the second layer and screw and plate it down. The screws and plates from the second layer will hold the first. Make sure that your screws are going at least an inch into the deck.
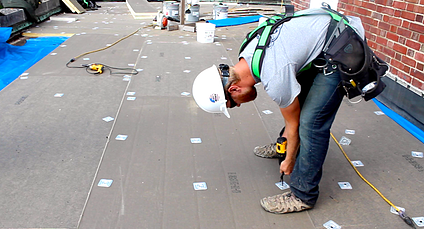
Tip 3. Screwed down or Glued down
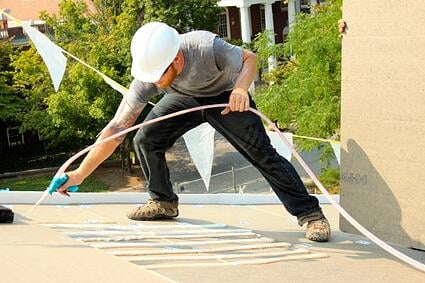
If you are required to adhere you polyiso board consider using one of the many foam adhesive kits on the market. These kits typically consists of two disposable canisters, one of low rise foam and one of adhesive. A hose and gun assembly mix the two materials together as they come out of the gun tip to form beads or lines of adhesive to lay the iso in. The installation is clean and fast. So fast in fact that per every kit you have a man spraying you will need two more men carrying and laying in ISO.
If your Polyiso is going down mechanically attached, ditch the cordless drills or impacts and invest in corded screw guns. They will take a little getting used to but will double or triple your production, especially on larger jobs. There are many types and models on the market but the Dewalt 268 has proved itself on our crews time and time again. Each screw gun you purchase will pay for itself through labor savings in a day or two and you won’t have to charge batteries all the time.
TIp 4. Measure Twice, cut once
When you begin to cut in polyiso at the perimeter of the building or around roof details such as HVAC curb and plumbing stacks, take a tight measurement and then deduct a 1/4 of an inch. This will allow you an 1/8 on each side which is well within NRCA guideline of not having gaps larger than one quarter of an inch in size between pieces. Polyiso is difficult to trim up with any amount of precision so trying to cut in ISO
too tight the first time can actually make you leave bigger gaps than if you had taken 1/4 of the original measurement. Not to mention the time it takes to cut each board twice.
Hint: Use a utility knife to cut, score, and break thin iso but for thicker pieces use a ISO knife or skill saw to make cuts faster and cleaner.
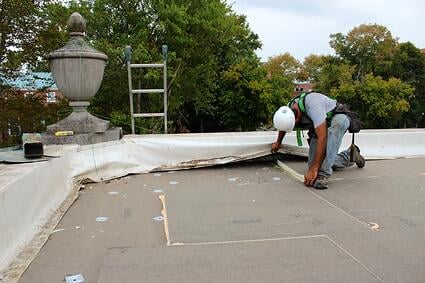
Tip 5. Storage and Keep polyiso dry
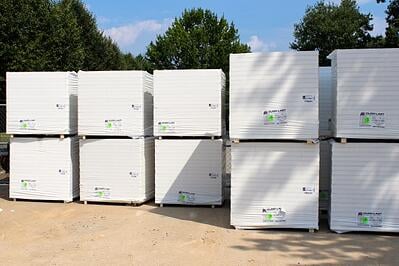
Polyiso is one of the best, most efficient way to insulate a building. That being said the stuff still int cheap. Wet iso will warp and will become much more difficult to install. It will require you to install many more screws and plates to get ISO to lay down or you may even have to discard wet iso if it is to be adhered. Keep roofing insulation will keep your crew moving, make your job look better, and mean that you could return extra pieces to supply house.
Hint: Cut the plastic wrapping on a bunk of iso in a way that you can re-wrap it at the end of the day, especially if you aren’t going to install every piece in the bunk. You can stretch the original plastic around the remaining iso and hold it in place by “pinning it down with some roofing screws.